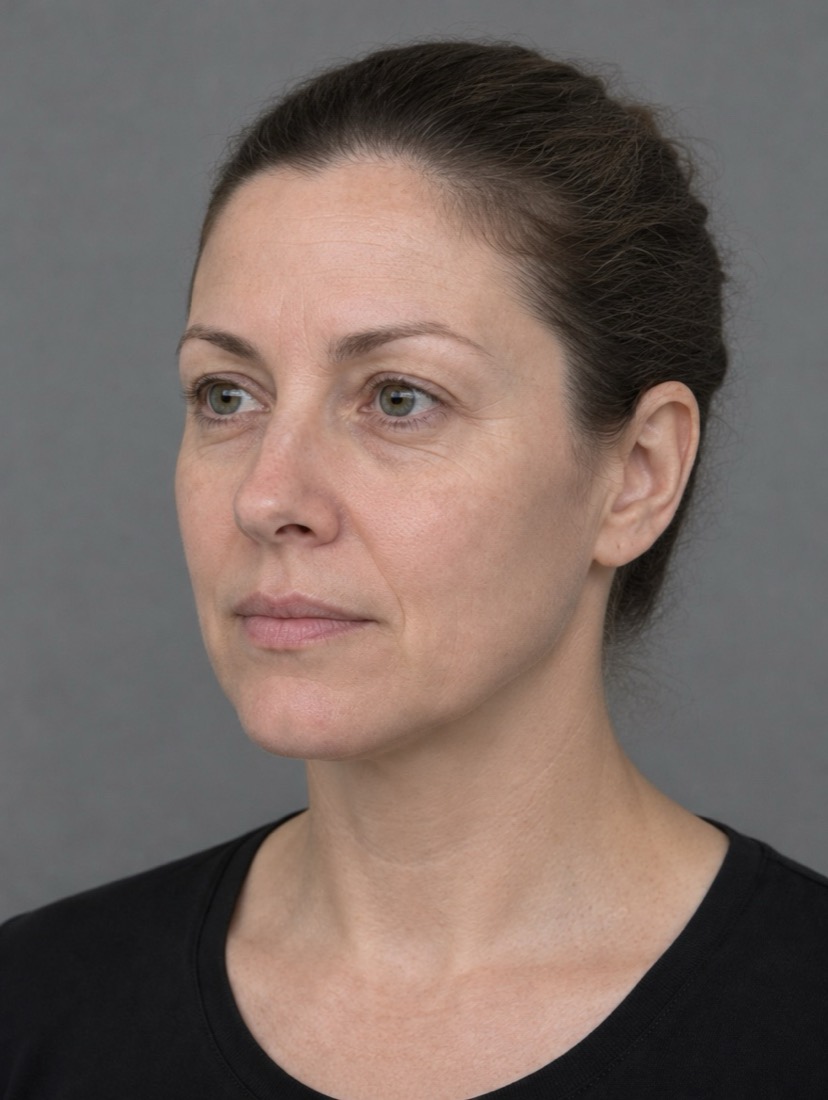
A before-and-after pair is evidence. It shows a patient what changed, protects the practitioner if a result is questioned, and becomes part of the medical record. But it only works if the two photos differ in one way: the treatment. Change the light, the distance or the angle and the comparison stops telling the truth.
These are the seven variables that matter most, and how to fix each one.
1. Light: soft, even and the same every time
Light changes how skin looks more than anything else. Overhead light deepens lines and hollows; window light changes through the day. Use a fixed, diffused light source in front of the patient at face height, ideally a pair of soft panels at roughly 45° on either side. Turn off mixed overhead lights so the colour stays consistent.
Photograph in the same room, in the same spot, every visit. Mark the chair position on the floor if you need to.
2. Background: plain and neutral
A mid-grey or soft blue wall gives skin tones nothing to compete with and keeps the camera's exposure steady. Avoid white walls (they push the face darker) and patterned or cluttered rooms.
3. Distance and lens
Standing closer makes the nose look larger and the face narrower; standing further away flattens it. Keep the camera at the same distance every time, roughly 60 to 70 cm for a face on an iPad. Never use the ultra-wide lens for clinical photos, because it distorts the edges of the face.
4. Height and head position
Hold the camera at the patient's eye level. For head tilt, clinicians use the Frankfort horizontal: an imaginary line from the lower edge of the eye socket to the top of the ear should be level. A head tipped a few degrees up or down changes the jawline and the under-eye area more than most treatments do.
5. The standard angles
Most facial work is recorded from five or six views:
- Front, looking straight ahead
- 45° left and 45° right (the oblique views)
- 90° left and 90° right (the profiles)
- Extra views for the area being treated, such as chin up for the neck
For the 45° views, a useful check is that the tip of the nose lines up with the far cheek.
6. Expression, hair and make-up
Ask for a relaxed, neutral expression with the mouth closed, unless you are recording dynamic lines (for example, a frown or a raised brow), in which case photograph both. Tie hair back off the face and ears, remove earrings and glasses, and photograph without make-up wherever possible.
7. Camera settings
Automatic exposure and white balance try to "fix" every photo differently. Lock them, and keep focus on the eyes. Never apply filters, beauty modes or edits to a clinical photo, not even a crop that changes the framing.
Make it a routine, not a skill
The hard part is not knowing these rules; it's following all of them, every time, at the end of a busy day. That's why we built HonestFace's guided camera. It measures turn, tilt and distance live, shows the last visit as a ghost to line up with, locks the camera settings, and only takes the photo when the face is in place. Whoever is holding the iPad, the result is the same.
